Table of Contents
Since my very first trips, I have always wondered how to make a travel video that worth watching.
Videos are way more powerful than pictures. And I love having vivid memories from my trips, so I wanted to be good at creating my travel videos.
The problem was, that I never had any kind of experience or knowledge about filmmaking or video editing. So where to start?
Most of what I have learned has been through trial and error and watching a ridiculous amount of tutorials. But as of today, I am proud of being able to produce visual travel videos with my experiences. It does not only allow me to enjoy my trips again back at home but sometimes I have even been able to make money out of them.
So if you want to learn how to make a travel video step by step, keep reading
This page may content affiliate links. Click here to read our disclosure
What do I need to make a travel video?

There are only 2 things you need to make a travel video:
- A camera. What you will use to produce the video. It could be your phone, a GoPro, a DSLR camera, a drone, etc.
- Editing Software. This would be the tool you’ll use to edit the video. It could be OpenShot, iMovie, Final Cut, Premiere Pro, etc.
That should be enough to start with. But with the time and as you get better at it, you will end up using more gear like gimbals, tripods, and different editing tools.
Recommended gear to make a travel video
There are different ways you can create a travel video and so there are different tools you could use.
In this list, I have included only the most practical items I use to make our travel videos:
- Huawei Pro 30 mobile. Having a phone with a great quality of image and video is a must these days. The reason we chose this phone over any other, is the battery lifetime, and pictures and video quality. We are big users of Instagram and this phone has been life-changing for our quick Instagram shots and stories, and for the clips, we use in our travel videos.
- Fujifilm X-T3. This is my day to day camera for photography and video and could not be happier. It is fast, reliable, and relatively small and easy to travel with. If you want to see the results visit our Youtube channel.
- GoPro Max. If you intend to shot action or underwater footage, this is a must. Also, 360 videos are now taking off and it is very good fun. We use it mainly when we dive or to capture action closely.
- DJI Mavic Pro 2. One of the best things I have ever bought is this drone. It really makes a difference for more cinematic footage and to see things you could not even see otherwise. This drone has also allowed me to make some money with my travel videos by making promo videos to some hotels.
- Zhiyun Crane Plus Gimbal. It wasn’t until I bought this gimbal when I saw a big improvement in my videos. Thanks to this gimbal, you will reduce your shacking dramatically without the need of using any external software. If you are serious about making travel videos, I’d honestly recommend you this tool.
- . This is the most practical thing ever invented for those of you who use mirrorless cameras or DSLR. Since I discovered this tool, I take my camera with me all the time even for trekking, since this makes it painless to carry.
Probably, your main tool is going to be a camera. So I recommend you to check this updated post with the best mirrorless cameras for travel.
Lastly, you are going to need a specific camera bag to have easy access to your gear while keeping it organized. After many bags, my recommendation is the . But if you have doubts, you can read about the best travel backpacks and find the best for you.
Tools you need to edit a travel video
There are many tools you can use to edit your videos.
The easiest software tools to edit are iMovie, OpenShot, and Quick. With these tools, you can pretty much drop your clips to the timeline and you’ll receive instructions in real-time for the next steps.
These are nice tools for beginners, but even for me when I started, I felt I needed more a few months after using them.
Then I jumped to Final Cut (Apple Only) which I used for a long time. It is powerful yet simple to use, and it really allowed me to improve my videos. But after a while, I needed even more and moved to Adobe Premiere Pro, which is the one I still use today.
It is all about sensations. So I’d recommend to start with an easy one at the beginning if you do not have any experience, and then jump into a more complete tool. But if you do have some knowledge, I would give a try to Adobe Premiere directly.
Kinds of travel videos
Travel videos come in many forms: from the usual walk and talk vlogging style to a more informative documentary style or cinematic.
To find yours, think about the way you want to produce it and edit.
For example, I don’t enjoy talking to the camera, so I opted for more cinematic travel videos. These are inspirational travel videos with cinematic footage of the destinations we visit and with music in the background. But that is how I am and what I like to do and to show.
But what is your style? what would you like to show in your travel videos? Once you know how to answer these questions, you will know the kind of travel videos you want to do.
How to make a travel video for beginners
There are many different ways of how you can make a travel video. The process explained in this section is only for people who do not want to invest a lot of time and want an easy and simple solution. If you want much better results and are willing to spend some more time, we’ll cover it in the next sections.
To start with, you are going to need some footage. Ideally, in the form of video, although you can also use pictures. You can use your phone or camera with automatic settings to start with. Choose the video functionality and start shooting at your subject.
For better results, try to be as stable as possible to reduce shakiness. Also, try to use as many clips as you can to have a more dynamic video. It is more interesting putting some short clips together rather than a very long one. Take into account than most of the people will lose interest if you keep with the same clip for so long.
Once you have the clips you need to start your project, is time to edit them.
One of the easiest ways to edit a video might be with a single PowerPoint presentation. You could easily put some pictures or video clips together, add some animation and music, and you’ll have a simple travel video.
But these days, there are also some free tools you can use to put together a nice travel video effortlessly. Some the easiest editing tools I recommend you to use are OpenShot and Quick
The process to create a video with these apps is pretty easy compared with more complicated tools like Premiere Pro, Da Vinci, or Final Cut. All you need to do is to drag your clips to the timeline, and follow the steps of the live tutorial:
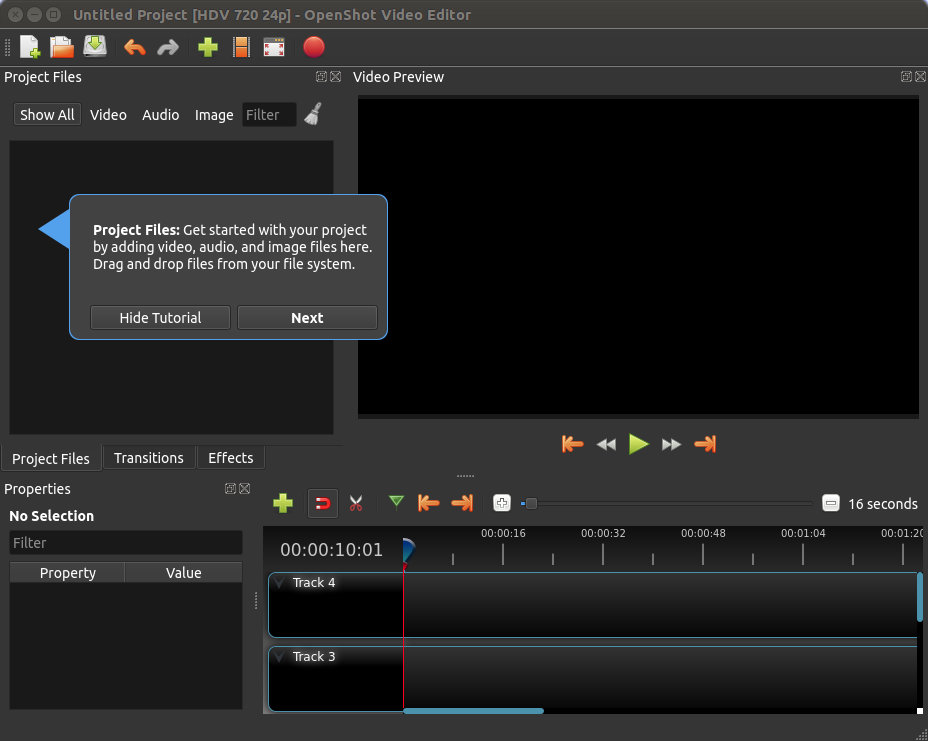
You can use pictures or videos from your phone or camera. And even though the first one might take you a while, it is a very automated process and you’ll soon learn how to make a travel video fast.
So if you ask me about the easiest way on how to make a travel video for beginners, these tools would be my answer.
Tips for how to make a travel video worth watching
#1. Invest some time in “formation”

It does not matter if these are Youtube tutorials, blog post tutorials, reading a magazine, etc. But some formation can only improve your knowledge.
Reading this post is already a great start on how to make a travel video, and we hope by the end of this post you will be able to make one yourself. But don’t settle with the basic knowledge and go always for a bit more to give that different touch to your videos so people want to watch them.
Since we are talking about how to make a video, you might have guessed one of the best places where to learn is Youtube.
There are a ton of free tutorials in Youtube you can benefit from. The downside though is the time. You might see tutorial after tutorial until you really find the one worth watching and really teaches you something. So my advice is that you look for someone first with a solid audience and many tutorials.
What you need to do.
Look for a Youtube creator aligned to the style of videos you want to create and to the platform you’ll use to create your videos. You want to make sure they have a tutorials section and that they upload videos often.
#2. Look for inspiration
I would lie if I said all the ideas of my videos came all from myself. But I am not alone, thousands of creators get inspiration from other artists on Youtube and it is totally fine.
I like to be on top of new techniques, fresh ideas, and editing tricks some other creators use. A clear example is Sam Kolder. This lad has inspired thousand of creators who even have Youtube channels dedicated to teaching how he edits his videos.
I think it is important to see how other people work and learn from them so we can apply some of their techniques in our travel videos.
For example, my first videos were really plain. Just a bit of action here and there, but with no fancy transitions, interesting camera angles, or editing hacks to make them more visual.
Below you can see the proof. On the left-hand side, one of my first travel videos in Zanzibar. In this video, I handheld my camera, I did not use transitions, and it is all pretty much at the same speed with little variations. It is not really bad (I think), but there is a lot of room for improvement.
However, not much later I made the video on the right-hand side about our trip to Hong Kong. And after getting inspired by some videos I saw, I learned some new techniques like the use of the gimbal to reduce shakiness, speed ramps, hyperlapses, etc. You can see there is a big difference between both.
What you need to do.
Your task is to look for a Youtube creator that really inspires you. This has nothing to do with tutorials. This is more about the way they approach subjects with the camera, analyze the kind of shots they include on their videos, transitions, and that kind of stuff. This is about their travel videos and the impact they have on you.
In my case, most of the inspiration comes from Benn TK. I really think he does a magnificent job and takes video edition to another level.
Thanks to him, there is always something new on each video I publish.
#3. Research where you want to shoot ahead.
After we have learned a bit more techniques and have some inspiration, it is time to do some research.
To me, this is one of the most important steps. It would not be the first time I miss a great spot for shooting after I leave. And it can be really frustrating, believe me.
So my recommendation is that you investigate the place where you want to shoot. It does not matter if it is about a city or just a single location like a landmark. The reason is that you might think you’ll find the best angle or the most beautiful area once there, but it could be one even more impressive. You can avoid this by doing a bit of research ahead to find the best spots and interesting places where to shot.
It can also be very helpful to find places with little touristic interest but great but shooting your travel video.
What you need to do.
I recommend you to use 3 different ways to do some research about the destinations you plan to visit:
- Google. Simply Google the destination and look for Google Images on that destination. If something catches your eye, click on the image to find out where to find that spot.
- Youtube. Another easy option is to look in the Youtube bar for the destination you intend to visit and check the videos that catch your eyes. You might get very good ideas on the video itself but also about the locations.
- Instagram. I reckon this might be the method we used the most to find cool locations for shooting. Simply insert the place you want to visit in the search bar and click in the result to find the info you need.


#4. Come up with a story
Ideally, before starting shooting you should come up with a story.
I am not going to lie to you, this is probably the most difficult part of all the process, but it is also what makes a difference. With coming up with a story what I mean is to try to establish a timeline in your video, so when you put all the clips together it tells a story and it makes sense.
You don’t want to put random clips together with the hope it will make sense. Otherwise, people will get bored and won’t watch your videos.
Most of the time, I don’t know what the story is until I arrive at the destination and feel the vibes. Sometimes it will be a story focused on landscapes, sometimes on local people, or on us having some experiences.
If you can’t come up with the story ahead is ok. Just try to have your camera ready at all times so you don’t miss anything. The trick is to shot as much as you can so you have a lot of footage to create your story later on.
What you need to do.
Try to think about what you want to be the beginning, the middle part, and the end of your video. Once you have that, all you need is to create the footage to tell the full story.
It could tell how you spend a day in a place, the way you want to show a destination, how local lives in certain places, etc.
Look at this example where we spend a day in Winter Wonderland in London. For this travel video, the story is what is like a day in Winter Wonderland.
#5. Set up the right settings.

It does not matter how good is your story or editing skills if your settings are not the right ones. The aperture and shutter speed are key on how to make a travel video properly.
Even if you are a beginner, I would not recommend relying on the auto mode for video regardless of the kind of camera you are using.
Consistency is going to play an important part in your video clips. If you stick to the same settings for all your video clips in terms of colors and shutter speed, the final result will look way better. By doing that you will preserve colors in the same way across all the video and will also reduce the editing after. But sometimes the auto mode can mess that up.
What you need to do.
You’ll need to set up the right settings on your camera.
It does not matter if you are using your phone, a GoPro, or a drone. These adjustments can be done on any camera.
For example, if you are using your phone and your camera to make a video, by aligning the settings similarly on both, you will get a more homogeneous result when putting the clips together.
Adjustments like ISO and aperture (F-number), will depend on light and focus. Also, most of the camera has color profiles to give a different look to your footage. When used properly, this can be your video a very unique touch and can be your signature.
But what you should take into account is the shutter speed. This is what will give your videos a more cinematic look. As a rule of thumb, you want your shutter speed to be approximately double the number of frames per second that you are recording. So, if you’re recording at 30 frames per second, you want your shutter speed to be 1/60th of a second.
For example, I shot at 4K 29.97FPS (1/60) when I want cinematic footage. And at 1080 120FPS (1/240) for slow motion.
#6. Shoot as much as you can
One of the best tips I can give you is to shot as much as you can.
With travel videos, any clip can be a life-saver. You might use that clip you did not think you needed for a transition, or to end up a scene or whatever.
What I can assure you is that when you are putting the clips together to edit your travel video, you will miss a shot eating here, footage of that nice restaurant and there, how locals cooked, etc.
There are some cases where I really struggled to finish some of my videos because I really felt there were so incomplete, and there is nothing worse. You have a lot of footage, you put them together, but you realize you are missing part of the story you wanted to tell and your video loses strength.
So the easy way to fix that is to shot and shot whenever you can. Every clip might be useful in the end.
What you need to do.
All you need to do is to have your camera ready at all times. Shot at every opportunity you have. It will make much easier to put your story together afterward with more options where to choose from.
#7. Get closer to your subject


Which one is more powerful?
Close-ups are powerful.
It does not matter if you are shooting action, a person, or a landmark. Try to always focus on your main subject and get closer.
If the subject is a person, there is nothing more powerful than emotions. The excitement when doing an activity, the surprise of discovering something new, etc. These emotions transmit a great deal to the viewer and the closer the better.
The same happens with a landmark, for example, if you are using a drone. People tend to use drones to fly high, but instead, getting closer to the subject is way more impressive and interesting.
What you need to do.
You need to clearly identify the main subject in your shot so you can focus on it.
For example, if someone is cooking something, it would be more interesting to focus on the hands. Is where the action is, cutting, peeling, steering, etc. Or if someone is in a beautiful place for the first time you’ll want to capture the emotion in their eyes.
For the drone is the same thing. Do not forget about your subject and bring it as close (but safe) as you can. That way your videos will become more personal.
#8. Use timelapses/ hyperlapses
Is there something more visual than a timelapse/ hyperlapse?
Timelapse photography is based on taking a series of photos at regular intervals and combining them. Hyper-lapse is the same but adding movement.
This is a great technique that can really make a big visual impact on your videos. These are great for opening and closing videos.
It works especially well to capture the beauty of a place with photography and convert it into motion.
What you need to do.
Most of the cameras, even on phone have a timelapse function. But in order to make a timelapse properly, you will need a tripod.
In order to create a successful timelapse you must:
- Set the camera in the tripod
- Manually adjust settings according to light. This is important because if you leave it in auto, colors can change dramatically from shot to shot and the effect won’t be as good.
- Set up the interval between shots.
- Sit and relax
- Finally, you’ll need to put the sequence together. Most of the phones and cameras today, do that already for you. Otherwise, you’ll need to use external software.
Here you can watch a tutorial on how it is done using Premiere Pro.
#9. Editing your video

Editing your videos is with no doubt, the most time-consuming part.
In the beginning, it can be overwhelming. You have a bunch of video clips that you need to put together telling a story. Not an easy task, but has to be done paying attention to the detail in every single clip.
One of the most important things on how to make a travel video that gets views is to use music and sound effects. This is a must in the editing process. You should use no copyright music for creators. Also, the music you choose should align with your video message.
Moreover, using the right sound effects will help you enhance your videos. They will make people feel it rather than just watch it.
If done properly, this could bring a lot of eyeballs to your video. But if you fail in connecting the clips in a seamless way and music is off, people will not engage with your video and might get bored soon.
In the video below you can see how I put a few drone clips together and I only added sounds effects.
What you need to do
- I’d recommend starting with the music you want to use. That way, you can start by adding your music track to the project and find clips aligning with the music instead of the other way around. Use the audio library for content creators.
- Then, you need to choose the software editing tool you are going to use. Remember we covered this at the beginning.
- Once you have all this, you need to be able to connect one clip with the next smoothly and tell a story.
In order to do this successfully, you need to connect your clips taking into account things like:
– Motion. If one clip moves from left to right and the next one starts from left to right as well, they will connect smoothly.
– Colors. Try to match colors to transition from one clip to another. For instance, if you filming fire in a clip, the next clip could be starting with something orange or yellow.
– Camera movement. This is the one I use the most for my transitions. I move the camera in one direction at the end of a clip and start the next clip with the same movement in the same direction. That way the transition between the clips will be smooth.
I recommend you create a folder for each of these categories to group each clip inside. Then it will be easier to see which clips connect better between them. - Then, look here for sounds effects matching your video clips.
- Lastly, you’ll need to export your video, which will cover in the next section.
Editing your videos is the most important step of all. That is why I strongly recommend you to invest in this video creator course. It is a great course that covers how to edit a video on all the different platforms.
#10. Exporting your video

After all the hard work you have done, you don’t want to export your video with the wrong settings.
My advice is to export always at the highest quality possible. The reason behind this is that all the platforms will compress your videos once you upload it. It does not matter if you are uploading it to Vimeo, Youtube, or Facebook, they all do in a way or another.
The values will depend on the tool you are using to edit your video and the platform where you want to use them. For instance, if you want to upload your video to Facebook the best settings are:
- H.264 video with AAC audio in MOV or MP4 format
- An aspect ratio no larger than 1280px wide and divisible by 16px
- A frame rate at, or below, 30fps
- Stereo audio with a sample rate of 44,100hz
Each platform will have its optimum values which you should try to stick to.
What you need to do.
The export process will depend on the tool you use to edit your video. For this example, I am going to use Adobe Premiere Pro.
- Go to File>Export>Media and open the export window
- Choose your sequence settings according to the platform where you want to share your video.
- Fine-tune your settings. Select audio if you need to and render at the maximum depth
- Export your video
You can find this process step by step with screenshots in this post.
Bonus Tip- Get a drone!
Probably, the best investment I have ever done is the Mavic Pro.
Thanks to the drone, not only my videos look way more cinematic, but I have been able to make money out of it.
I use the drone for both photography and video, and I want them to be top quality, that is why opted for the Mavic Pro 2.
But if photography is not that important to you, there are many inexpensive yet powerful drones you can get. A couple of examples are the DJI Mini ($499 as of today) or a bit more pro in between both, the Mavic Air 2 ($799 as of today)
Since I have it, I combine clips from my camera and the drone to create epic travel videos. And what’s even best, it has been the only tool which has allowed me to make some money with my videos so far. I have created a few promo videos and drone clips by reaching to hotels and brands aligned with our content.
So if you are thinking about what should be your next piece of equipment, I’d definitely say a drone is!
If you already have one, you should. check how to improve your drone photography in one day.
Conclusion
I really hope by now you have learned how to make a travel video worth watching!
Like every other process, this is all about practice. The more you practice these steps, the better you’ll get at it. You need to be patient. If you follow these steps, I guarantee you’ll already see a big improvement in your videos.
And once you build your own workflow, everything will be easier.
If you have any other tips or questions, leave a comment below.
P.S. Don’t forget to follow us on Youtube for travel video inspiration
Did you Like the Article?
PIN IT!


